odop
Open Design Optimization Platform (ODOP) - Coil spring design app; mechanical springs; compression spring, extension spring, torsion spring
Getting Started
This page utilizes the Rectangular Solid demonstration case to provide a quick and less technical introduction to the ODOP software. For a more spring design specific introduction, see: Getting Started With the Spring Design Tutorial and Demo
Getting started with any computer program, ODOP included, is usually a matter of ... Try it. You'll like it !
Dive in and bash away at the program. It's not possible to break anything and a little experimentation usually goes a long way. In the worst case, you'll come away from the experience with a little more motivation to read more of the on-line documentation.
As noted in the discussion on other Help pages, ODOP currently offers five design types to work with. These include full-featured apps for compression, extension and torsion spring design plus the Rectangular Solid and Piston-Cylinder demonstration cases. If you are interested in learning about capabilities, concepts, and basic mechanics of how to operate the program, the Rectangular Solid design type is intended as a small and easy to understand demonstration problem and is a good place to start. The remainder of this Getting Started topic will use the Rectangular Solid design type to describe several screen captures that refer to the ODOP main page.
Note that the Terminology page of the on-line documentation may be helpful with some of the terms utilized here.
If you haven't seen it already, the ODOP Design Process Flow Diagram provides an important conceptual introduction to the overall design process within ODOP.
The ODOP software expects to start from an existing design. More information on this point is available at Default Designs.
While a user account is not required to access the ODOP software, an account with associated username and password is necessary to save designs into the cloud-based ODOP "Design Library". See: User Accounts for details on how to obtain an account.
The material below assumes that you will be able to operate the ODOP program in one browser window (or tab) at the same time that you are able to view this on-line Help material in a different browser window (or tab). See Launching the Program for more detailed instructions on how to get the program up and running with this multiple browser window (tab) configuration.
Before continuing with the material below, please confirm that the ODOP program is running in a browser window (or tab) and that the Rectangular Solid design type is loaded. You should see Independent Variables like Length, Width and Height. If you see the Independent Variables of the Compression Spring design type (OD_Free, Wire_Dia, L_Free, etc.), go to the File : Open menu, drop down the box under "Select design type to open:", select the "Solid" design type and click the "Open" button.
This screen capture illustrates selecting the Rectangular Solid design type
and its default design called Startup.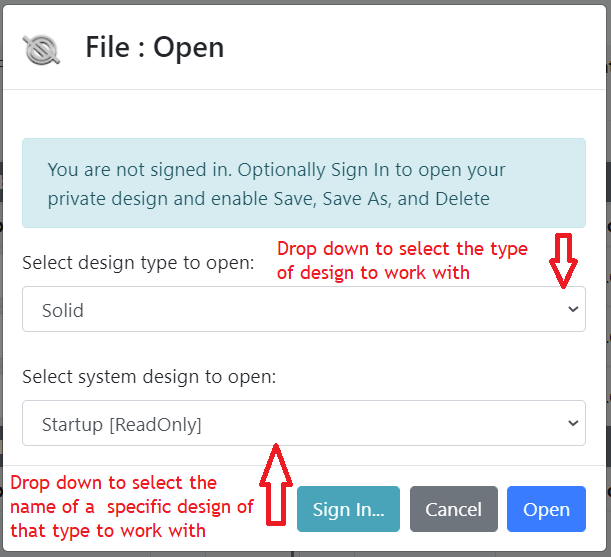
A Quick Tour of the Main Page
Have a look at the main menu (File Action View Help)
highlighted inside the red oval.
Select one of the main menu entries and a drop-down with sub-items will appear.
Here is an example of how each main menu item will drop down to provide
specific menu items.
Note that menu entries associated with not yet implemented features are disabled (gray).
This screen clip illustrates how to get to the index of Help pages.
At the upper right of the main page you see
an icon associated with the design type (a rectangular box in this case) and
the name of the specific design that is currently open.
![]()
The Result section is positioned near the top of the main page.
This area provides feedback about the solution process.
If you hover the cursor over a heading or a variable name,
a tool-tip will pop up to provide more information regarding each item.
There are numeric entry fields for each of the variables.
The user can change the value of Independent Variables by positioning
the cursor in the field and over-writing the existing value.
Recalculation will happen immediately.
The Dependent Variables, constraint violations and Objective Function will
immediately reflect the result of the new value for that Independent Variable.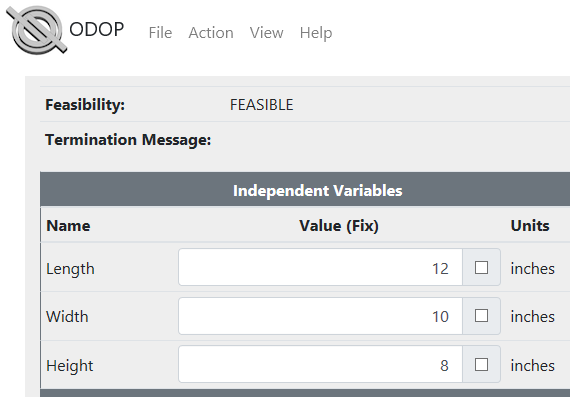
In order change the value of a Dependent Variable, it is necessary
to FIX (see below) its value and then execute the Search function
(Action : Search menu).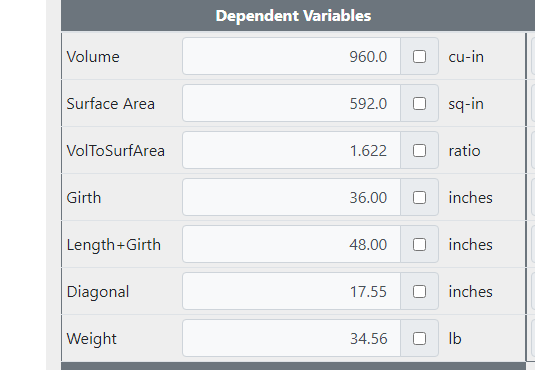
Calculation Inputs are quantities that can be modified by the user
but are not subject to Constraints, FIX or manipulation by the Search process.
You will likely need to scroll down to see the section containing Calculation Inputs.
This clip illustrates how a Calculation Input with a drop-down arrow
can expand into a table that the user can select from.
In this case, the user selects a material and the appropriate
material property values (density in this case) are provided to the calculations.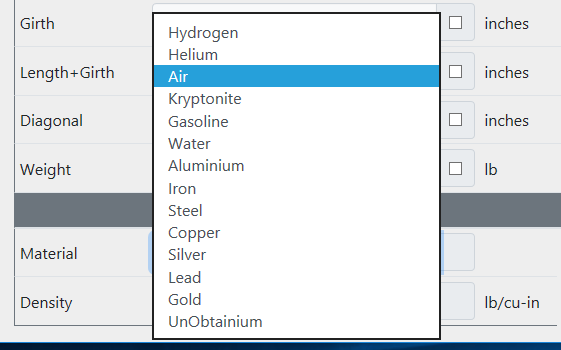
Constraints are single sided (Max or Min) limits imposed on the
selected Variable.
First, mark the checkbox and then enter a value in the entry field.
The amount of constraint violation will be immediately recalculated;
a positive value if violated or a negative value if satisfied.
The Objective Value will reflect the aggregate impact of all violated constraints.
This example illustrates the 108 inch Max limit on Length+Girth
and the 70 pound Max limit on weight that is common to many
carriers in the package shipping industry.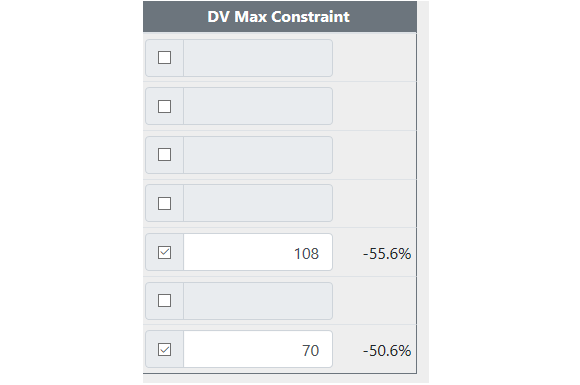
In order to FIX the value of an Independent Variable, put a check
in the box immediately to the right of its value.
Note the checkboxes highlighted by the red oval in this example.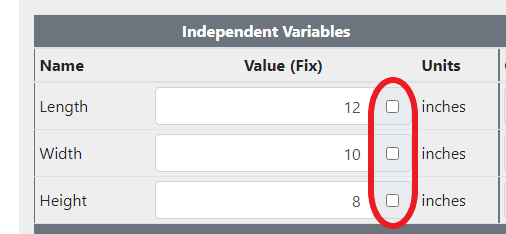
In order to FIX the value of a Dependent Variable, put a check
in the box immediately to the right of its value.
This will cause both associated constraints to be checked and the
corresponding constraint entry fields to become available for input.
Enter the FIX value into either entry field.
Thus, the FIX of a Dependent Variable is effectively a double-sided constraint.
Using Help
The quick tour of the main page is now complete.
This is a good time to get a better look at what is available
in the on-line documentation.
Most of the entries that are available after selecting the Help : Index menu
item cover the generic features and capabilities of the ODOP software.
So, as you are reading, please click the Help menu.
It will drop down to provide a list of entries (topics) to choose from.
Selecting Index on this list will bring up a new browser tab with the
list of available Help entries.
You can switch back and forth between the browser tabs.
If time is available, read through those entries from top to bottom.

On-line documentation for ODOP:Spring appears in the Spring Design topic.
Help Lookup
A full-text index of the on-line help is available. For more detail see: Help Lookup
Using the Tutorial and Demo Facility
The tutorial is designed to introduce new users to ODOP concepts, features and menus. It is recommended for new users as the most effective and organized way of learning the program.
Tutorial sessions are fairly brief. In most cases, the user is not required to do anything more complicated than read and hit the Next button. Each tutorial session covers a specific operation or capability of the software. It is possible to stop a tutorial / demo session at any point.
Demonstration sessions are available for the spring design types and illustrate problem solving techniques as well as provide sample solutions to several generally available reference book problems. The focus is on solving the problem, not explaining the operation of the software.
See: Spring design tutorial and demo